(1). 概述
在前面剖析了,我们通过ClientBuilder可以build出一个:PulsarClient,在这里,主要剖析:PulsarClient的构造函数初始化过程.
(2). PulsarClientImpl构造器
public PulsarClientImpl(ClientConfigurationData conf) throws PulsarClientException {
	this(conf, getEventLoopGroup(conf), true);
}// end PulsarClientImpl


// 通过配置(numIoThreads/enableBusyWait),创建:io.netty.channel.EventLoopGroup
private static EventLoopGroup getEventLoopGroup(ClientConfigurationData conf) {
	ThreadFactory threadFactory = getThreadFactory("pulsar-client-io");
	return EventLoopUtil.newEventLoopGroup(conf.getNumIoThreads(), conf.isEnableBusyWait(), threadFactory);
}// end getEventLoopGroup
(3). PulsarClientImpl构造器
private PulsarClientImpl(ClientConfigurationData conf, EventLoopGroup eventLoopGroup, boolean createdEventLoopGroup) throws PulsarClientException {
	// **********************************************************************************
	// ConnectionPool实际上是:创建Netty Client,ConnectionPool的内容,另开一篇来剖析,暂时就按照类的命名来理解:连接池即可.
	// **********************************************************************************
	this(conf, eventLoopGroup, new ConnectionPool(conf, eventLoopGroup), null, createdEventLoopGroup, true);
} // end PulsarClientImpl
(4). PulsarClientImpl构造器
private PulsarClientImpl(ClientConfigurationData conf, EventLoopGroup eventLoopGroup, ConnectionPool cnxPool, Timer timer, boolean createdEventLoopGroup, boolean createdCnxPool) throws PulsarClientException {
	try {
		this.createdEventLoopGroup = createdEventLoopGroup;
		this.createdCnxPool = createdCnxPool;

		// 验证serviceUrl
		if (conf == null || isBlank(conf.getServiceUrl()) || eventLoopGroup == null) {
			throw new PulsarClientException.InvalidConfigurationException("Invalid client configuration");
		}
		this.eventLoopGroup = eventLoopGroup;
		// 配置认证信息
		setAuth(conf);
		this.conf = conf;
		clientClock = conf.getClock();
		// ****************************************************************************
		// 认证启用,另开一篇去剖析
		// ****************************************************************************
		conf.getAuthentication().start();
		this.cnxPool = cnxPool;

		// 这里理解成两个线程池即可
		externalExecutorProvider = new ExecutorProvider(conf.getNumListenerThreads(), "pulsar-external-listener");
		internalExecutorService = new ExecutorProvider(conf.getNumIoThreads(), "pulsar-client-internal");

		// 策略模式
		if (conf.getServiceUrl().startsWith("http")) {
			lookup = new HttpLookupService(conf, eventLoopGroup);
		} else {
			lookup = new BinaryProtoLookupService(this, conf.getServiceUrl(), conf.getListenerName(), conf.isUseTls(), externalExecutorProvider.getExecutor());
		}

		//  这里用到了Netty的时间轮算法.
		if (timer == null) {
			this.timer = new HashedWheelTimer(getThreadFactory("pulsar-timer"), 1, TimeUnit.MILLISECONDS);
			needStopTimer = true;
		} else {
			this.timer = timer;
		}

		producers = Collections.newSetFromMap(new ConcurrentHashMap<>());
		consumers = Collections.newSetFromMap(new ConcurrentHashMap<>());

		// 事务协调客户端初始化
		if (conf.isEnableTransaction()) {
			tcClient = new TransactionCoordinatorClientImpl(this);
			try {
				tcClient.start();
			} catch (Throwable e) {
				log.error("Start transactionCoordinatorClient error.", e);
				throw new PulsarClientException(e);
			}
		}

		// 限流管理
		memoryLimitController = new MemoryLimitController(conf.getMemoryLimitBytes());
		// 状态模式
		// 状态配置为打开
		state.set(State.Open);
	} catch (Throwable t) {
		shutdown();
		shutdownEventLoopGroup(eventLoopGroup);
		closeCnxPool(cnxPool);
		throw t;
	}
} // end PulsarClientImpl

private void setAuth(ClientConfigurationData conf) throws PulsarClientException {
	// 认证插件或者认证参数为空的情况下,不对Auth进行配置.
	if (StringUtils.isBlank(conf.getAuthPluginClassName())  || (StringUtils.isBlank(conf.getAuthParams()) && conf.getAuthParamMap() == null)) {
		return;
	}

	// 通过:AuthenticationFactory创建:Authentication对象,在这里有可能是认证参数,也有可能是认证参数Map
	// 典型的策略模式哈.
	if (StringUtils.isNotBlank(conf.getAuthParams())) {
		conf.setAuthentication(AuthenticationFactory.create(conf.getAuthPluginClassName(), conf.getAuthParams()));
	} else if (conf.getAuthParamMap() != null) {
		conf.setAuthentication(AuthenticationFactory.create(conf.getAuthPluginClassName(), conf.getAuthParamMap()));
	}
} // end setAuth
(5). 设计模式
PulsarClient构造器,代码比较少,但是,看到了几个设计模式:
- 工厂模式(ThreadFactory/AuthenticationFactory)
- 策略模式(LookupService)
- 状态模式(State)
(6). PulsarClient类图
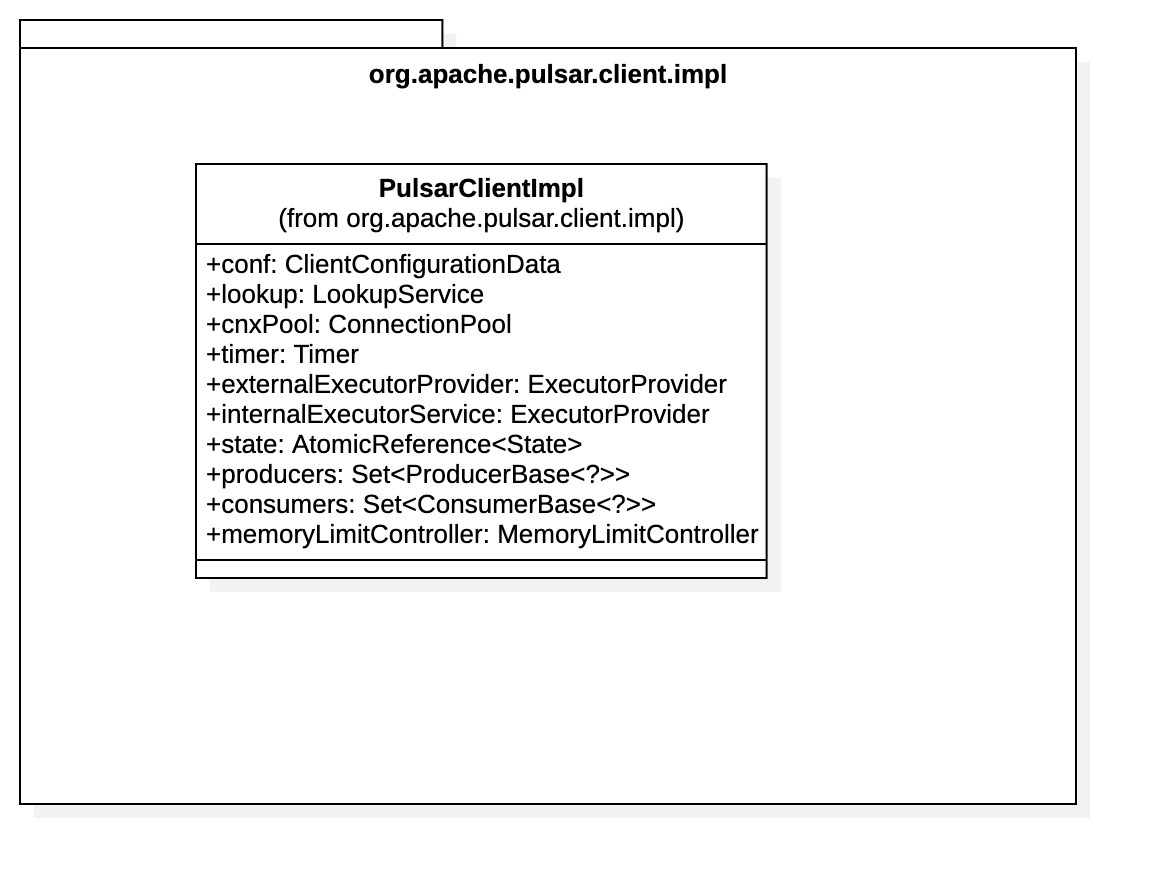
(7). 总结
PulsarClient构建器的过程如下:
- 通过ConnectionPool对Netty Client进行包装,目的是不用重复创建连接,而是共享连接.
- 如果有配置Auth信息,则通过工厂(AuthenticationFactory),创建:Authentication.
- 根据serviceUrl创建不同的的LookupService实现.
- 创建定时任务管理器,前面在剖析JRAFT时有专门开一篇来讲,在这里,我不剖析了的.
- PulsarClient内部会Hold住ProducerBase和ConsumerBase,它们都是集合类型.
- 如果开启了事务,创建:TransactionCoordinatorClient.
- 创建MemoryLimitController来管理限流.