(1). 概述
这一篇主要剖析:RepeatedTimer,因为,Node的源码里用到了它,我们知道, RAFT启动时,会产生一个随机延迟数进行选举,而这一步是需要构建一个定时任务来着的,上一篇,我们粗略的剖析了一下:HashedWheelTimer.
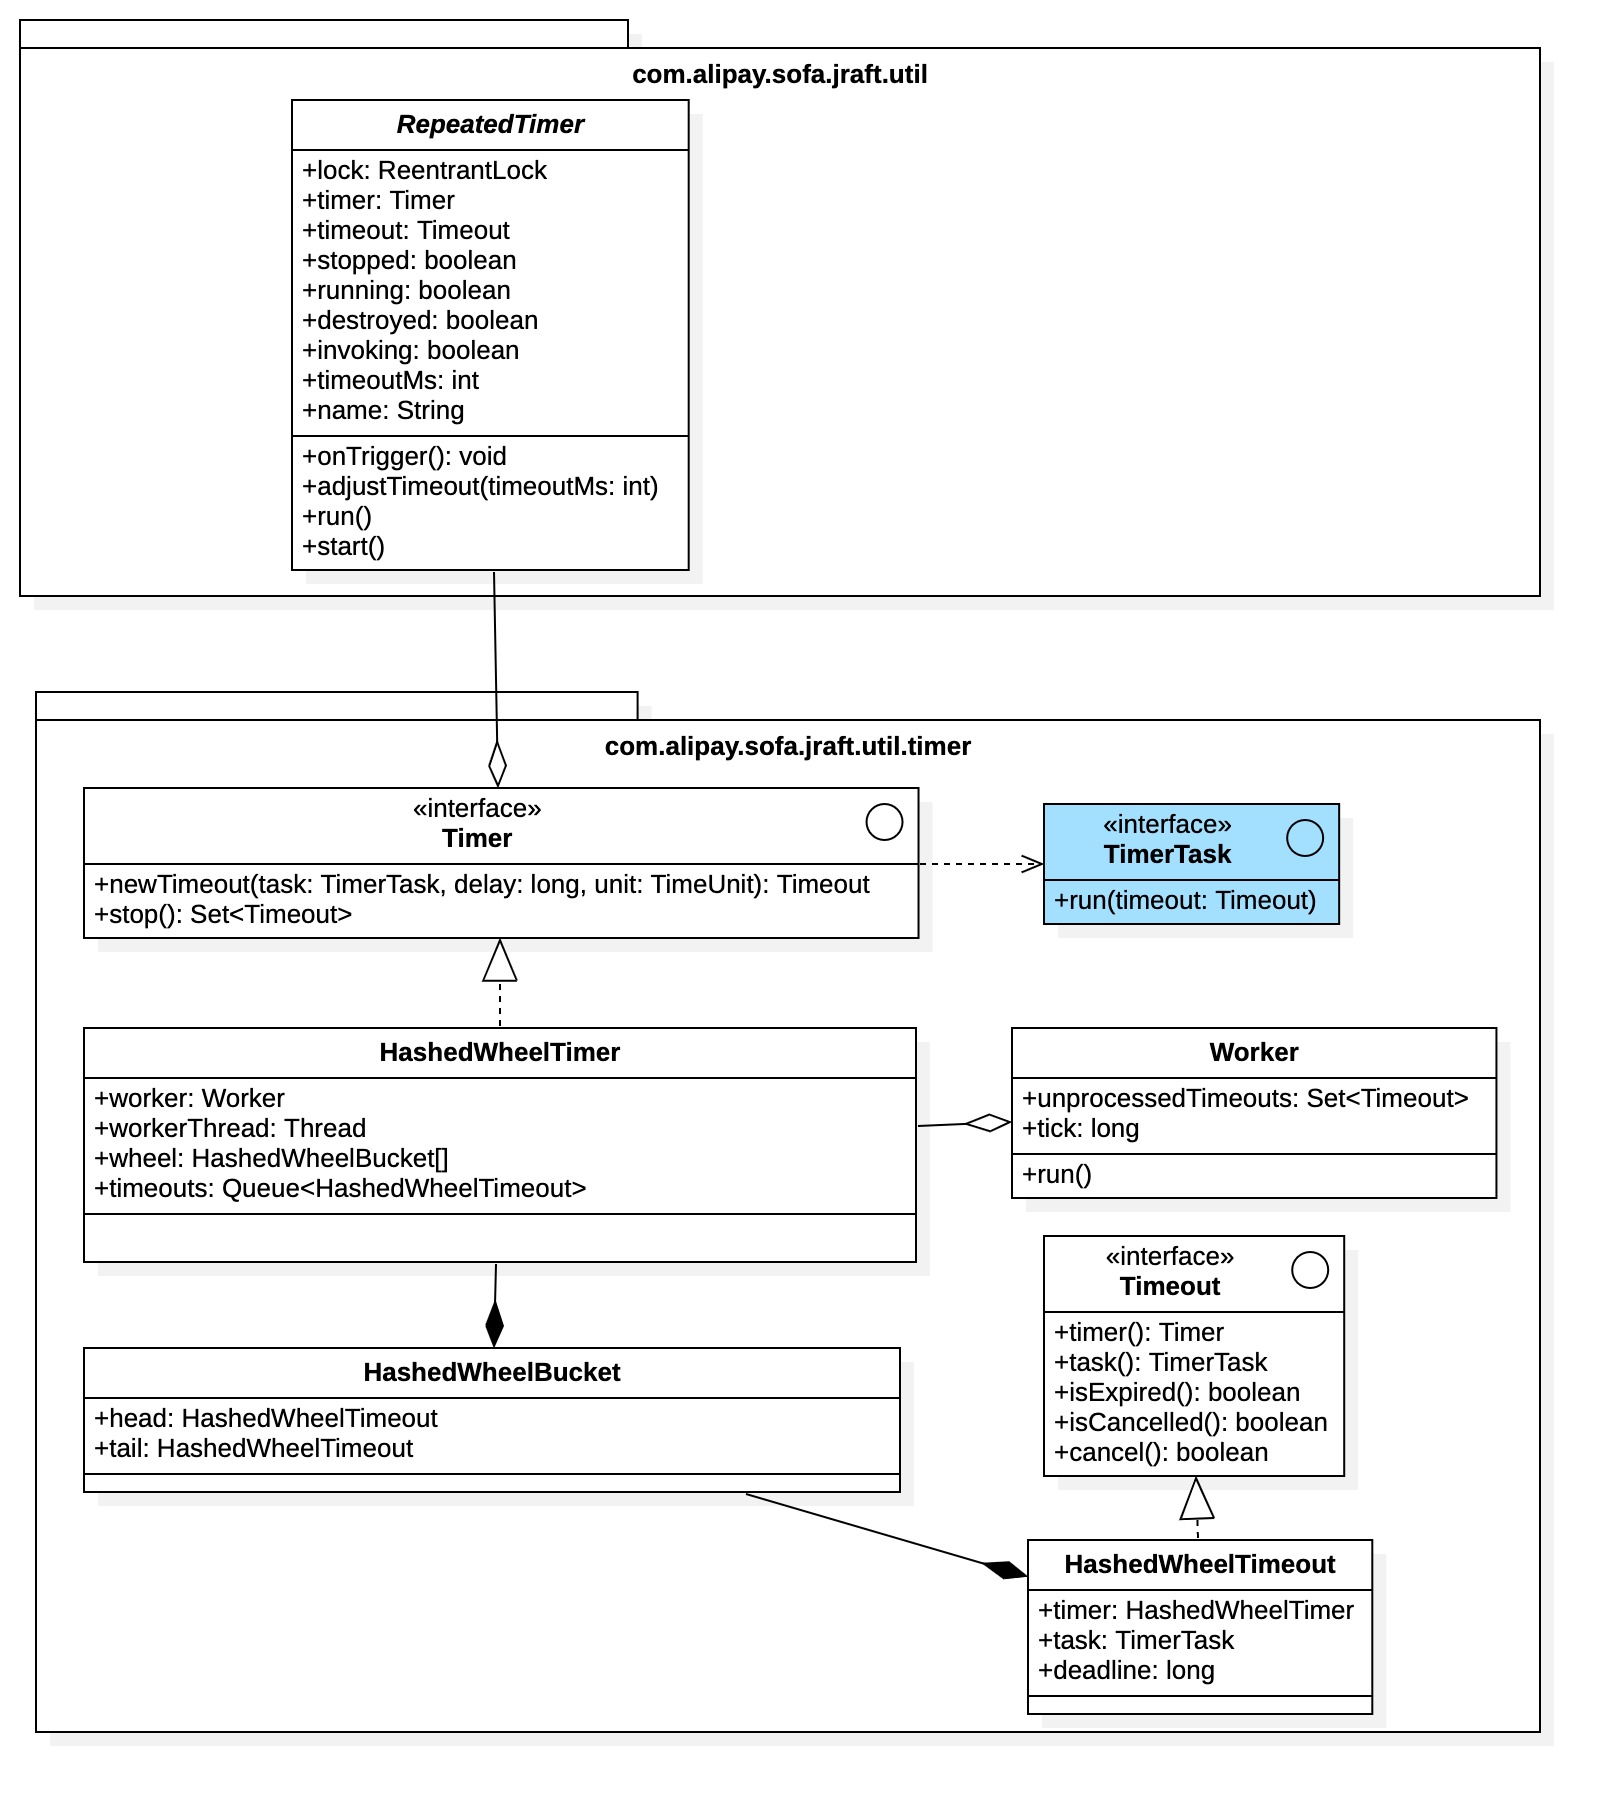
(2). RepeatedTimer UML图
(3). RepeatedTimer初始化
// ************************************************************************
// 1. 注意哈,这个类是一个抽象类
// ************************************************************************
public abstract class RepeatedTimer implements Describer {

    public static final Logger LOG  = LoggerFactory.getLogger(RepeatedTimer.class);

    private final Lock         lock = new ReentrantLock();
	// ***************************************************************************************
	// 2. 底层实是Hold住了一个定时任务管理器来着的,这个Timer前面章节有分析过了的.
	// ***************************************************************************************
    private final Timer        timer;
    private Timeout            timeout;
    private boolean            stopped;
    private volatile boolean   running;
    private volatile boolean   destroyed;
    private volatile boolean   invoking;
    private volatile int       timeoutMs;
    private final String       name;

    public int getTimeoutMs() {
        return this.timeoutMs;
    }

    public RepeatedTimer(final String name, final int timeoutMs) {
		// ***************************************************************************************
		// 3. 为timer进行赋值.
		// ***************************************************************************************
        this(name, timeoutMs, new HashedWheelTimer(new NamedThreadFactory(name, true), 1, TimeUnit.MILLISECONDS, 2048));
    }// end 构造器


    public RepeatedTimer(final String name, final int timeoutMs, final Timer timer) {
        super();
        this.name = name;
        this.timeoutMs = timeoutMs;
        this.stopped = true;
        this.timer = Requires.requireNonNull(timer, "timer");
    } // end 构造器
}
(4). RepeatedTimer.start
public void start() {
	this.lock.lock();
	try {
		if (this.destroyed) {
			return;
		}
		if (!this.stopped) {
			return;
		}
		this.stopped = false;
		if (this.running) {
			return;
		}
		this.running = true;
		// ********************************************************************
		// 调度
		// ********************************************************************
		schedule();
	} finally {
		this.lock.unlock();
	}
}
(5). RepeatedTimer.run
public void run() {
	this.invoking = true;
	try {
		// ***********************************************************
		// 1. onTrigger方法,需要业务自己去实现,这是个抽象方法
		// ***********************************************************
		onTrigger();
	} catch (final Throwable t) {
		LOG.error("Run timer failed.", t);
	}
	boolean invokeDestroyed = false;
	this.lock.lock();

	try {
		this.invoking = false;
		if (this.stopped) {
			this.running = false;
			invokeDestroyed = this.destroyed;
		} else {
			this.timeout = null;

			// ***********************************************************
			// 2. 调度
			// ***********************************************************
			schedule();
		}
	} finally {
		this.lock.unlock();
	}

	if (invokeDestroyed) {
		onDestroy();
	}
} // end run
(6). RepeatedTimer.schedule
private void schedule() {
	// 1. 先停止已经在运行的timeout
	if (this.timeout != null) {
		this.timeout.cancel();
	}

	// 2. 创建:TimerTask
	final TimerTask timerTask = timeout -> {
		try {
			RepeatedTimer.this.run();
		} catch (final Throwable t) {
			LOG.error("Run timer task failed, taskName={}.", RepeatedTimer.this.name, t);
		}
	};
	// 3. 创建定时任务,并启动
	this.timeout = this.timer.newTimeout(timerTask, adjustTimeout(this.timeoutMs), TimeUnit.MILLISECONDS);
}
(7). 总结
RepeatedTimer仅仅是在HashedWheelTimer的基础上进行了封装,留出几个钩子函数给业务使用.