(1). 机器准备
| IP | 主机名称 |
|---|---|
| 10.211.55.100 | master |
| 10.211.55.101 | node-1 |
| 10.211.55.102 | node-2 |
(2). 所有机器关闭防火墙和selinux
# 所有机器关闭防火墙
$ systemctl stop firewalld
$ systemctl disable firewalld

# 所有机器关闭selinux
$ sed -i 's/enforcing/disabled/' /etc/selinux/config
$ setenforce 0
(3). 下载Consul
# 下载consul
$ wget https://releases.hashicorp.com/consul/1.9.1/consul_1.9.1_linux_amd64.zip

# 把consul解压到:/usr/local/bin目录下(三台机器都要执行)
$ unzip consul_1.9.1_linux_amd64.zip  -d /usr/local/bin/
	Archive:  consul_1.9.1_linux_amd64.zip
	inflating: /usr/local/bin/consul

# 创建consul集群的配置文件目录和数据目录(三台机器都要执行)
$ mkdir -p /etc/consul/config && mkdir -p /etc/consul/data
(4). 创建集群配置文件(/etc/consul/config/consul_config.json)
Consul要求集群的数量是3或者5台(我这里三台机都安装Consul),为什么是3台或5台?因为它是CP模型.
另附:“Consul 配置参考文档”
master集群配置文件(/etc/consul/config/consul_config.json)
{
	"advertise_addr": "10.211.55.100",
	"bind_addr": "10.211.55.100",
	"data_dir": "/etc/consul/data",
	"server": true,
	"node_name": "consul_server_0",
	"enable_syslog": true,
	"enable_debug": true,
	"log_level": "info",
	"bootstrap_expect": 3,
	"start_join": ["10.211.55.100", "10.211.55.101", "10.211.55.102"],
	"retry_join": ["10.211.55.100", "10.211.55.101", "10.211.55.102"],
	"ui": true,
	"datacenter": "consulnet",
	"client_addr": "0.0.0.0"
}
node-1集群配置文件(/etc/consul/config/consul_config.json)
{
	"advertise_addr": "10.211.55.101",
	"bind_addr": "10.211.55.101",
	"data_dir": "/etc/consul/data",
	"server": true,
	"node_name": "consul_server_1",
	"enable_syslog": true,
	"enable_debug": true,
	"log_level": "info",
	"bootstrap_expect": 3,
	"start_join": ["10.211.55.100", "10.211.55.101", "10.211.55.102"],
	"retry_join": ["10.211.55.100", "10.211.55.101", "10.211.55.102"],
	"ui": true,
	"datacenter": "consulnet",
	"client_addr": "0.0.0.0"
}
node-2集群配置文件(/etc/consul/config/consul_config.json)
{
	"advertise_addr": "10.211.55.102",
	"bind_addr": "10.211.55.102",
	"data_dir": "/etc/consul/data",
	"server": true,
	"node_name": "consul_server_2",
	"enable_syslog": true,
	"enable_debug": true,
	"log_level": "info",
	"bootstrap_expect": 3,
	"start_join": ["10.211.55.100", "10.211.55.101", "10.211.55.102"],
	"retry_join": ["10.211.55.100", "10.211.55.101", "10.211.55.102"],
	"ui": true,
	"datacenter": "consulnet",
	"client_addr": "0.0.0.0"
}
(5). 启动集群
[root@master ~]# nohup consul agent  -config-file /etc/consul/config/consul_config.json &
[root@node-1 ~]# nohup consul agent  -config-file /etc/consul/config/consul_config.json &
[root@node-2 ~]# nohup consul agent  -config-file /etc/consul/config/consul_config.json &
(6). 查看集群成员
[root@master ~]# consul members
Node             Address             Status  Type    Build  Protocol  DC         Segment
consul_server_0  10.211.55.100:8301  alive   server  1.9.1  2         consulnet  <all>
consul_server_1  10.211.55.101:8301  alive   server  1.9.1  2         consulnet  <all>
consul_server_2  10.211.55.102:8301  alive   server  1.9.1  2         consulnet  <all>
(7). 查看集群状态
[root@master ~]# consul operator raft list-peers
Node             ID                                    Address             State     Voter  RaftProtocol
consul_server_2  bac521ce-10fd-c5f0-4362-71b3932ceffd  10.211.55.102:8300  leader    true   3
consul_server_1  df10596a-320f-794a-83e0-e50e52d626bb  10.211.55.101:8300  follower  true   3
consul_server_0  68852ff8-d8d5-54f8-5b60-a9564d5c8a6a  10.211.55.100:8300  follower  true   3
(8). 查看consul开启了哪些端口
[root@master ~]# netstat -tlnp|grep consul
tcp        0      0 10.211.55.100:8300      0.0.0.0:*               LISTEN      11281/consul
tcp        0      0 10.211.55.100:8301      0.0.0.0:*               LISTEN      11281/consul
tcp        0      0 10.211.55.100:8302      0.0.0.0:*               LISTEN      11281/consul
# 8500 为UI端口
tcp6       0      0 :::8500                 :::*                    LISTEN      11281/consul
tcp6       0      0 :::8600                 :::*                    LISTEN      11281/consul
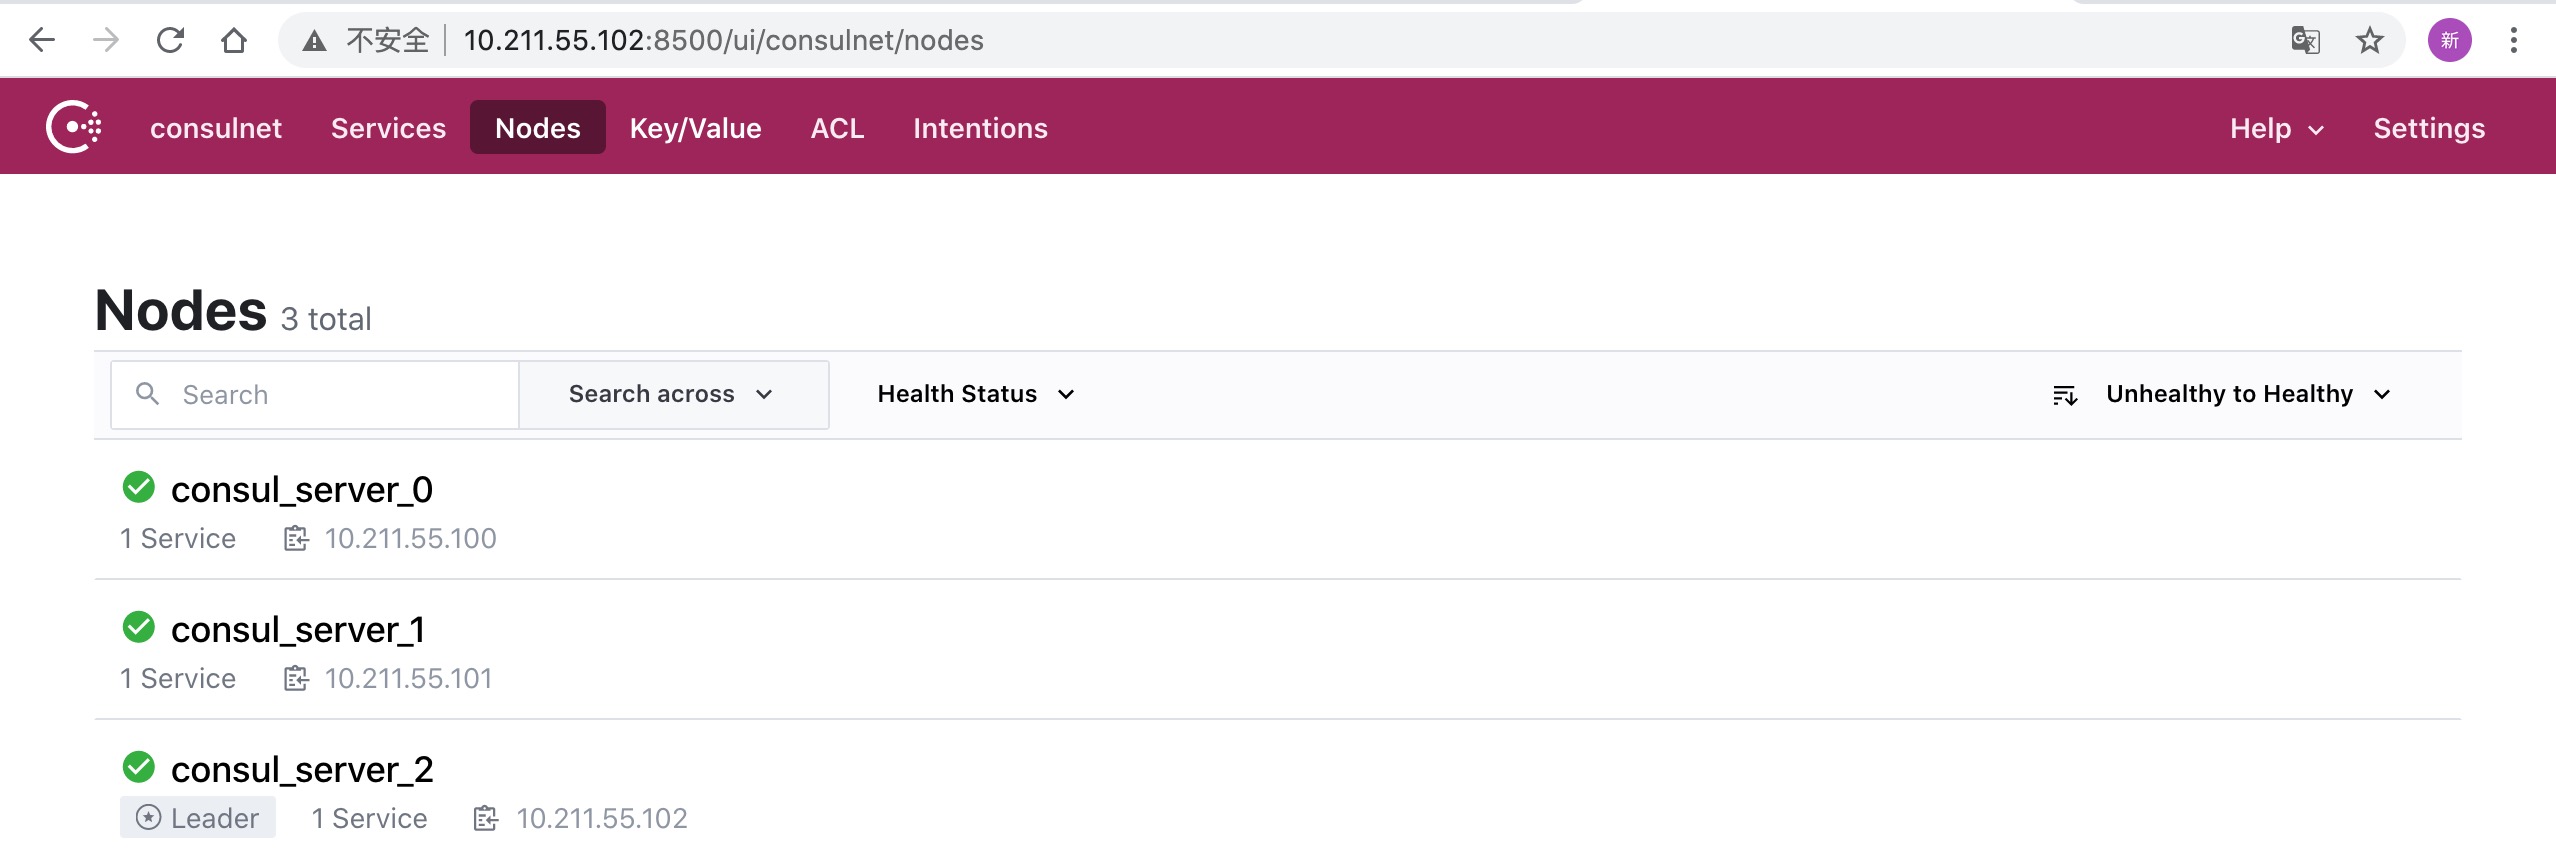
(9). UI查看集群状态

